
At long last... ALCOHOL INKS!!!
Ok first off I must give credit to the master himself, Tim Holtz, most of what I know about these inky things I learned from him. A few other tips I got from CKU too! I hope you enjoy!
First the necessary supplies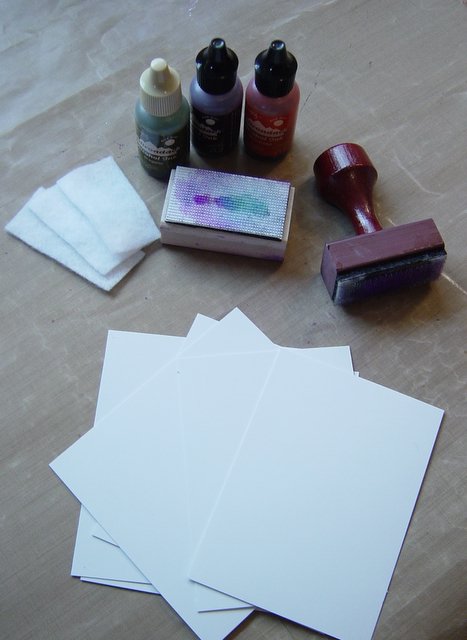
- the alcohol inks (I like to use 2 or 3 colors on a single piece)
- applicator, these can be purchased or you can make your own, to make it yourself you will need a small wood block (I used a left over block from un-mounting on of my stamp sets), sticky sided fun foam, and the grabby (for lack of a better word) side of a piece of velcro. Cut these items to fit your block and layer foam then velcro.
- felt, I buy the sheets from WM and then cut it to fit my block
- something to cover your work surface, I like to use the non-stick craft mat from Ranger. (This is the brown thing we are working on in the example)
- something to ink, again in the example we are using glossy cardstock. You can ink just about anything, I have done metal brads and hinges, clear plastic pieces, mica tiles, transparencies, this stuff will stick to anything.
Now lets get started!
Most important thing to know when you are inking things is how to put the ink on the applicator. Start with the opened bottle of ink and bring your applicator with a clean piece of felt to the top of the bottle, then flip the bottle and applicator over. If you do it this way you will avoid getting ink all over you and your clothing. Good tip! So after you have done the flip give the ink bottle a squeeze and count to two, flip back over and add another color or two the same way.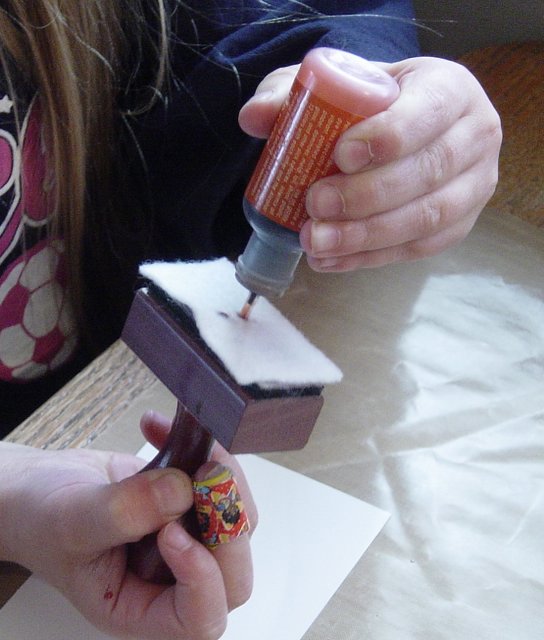
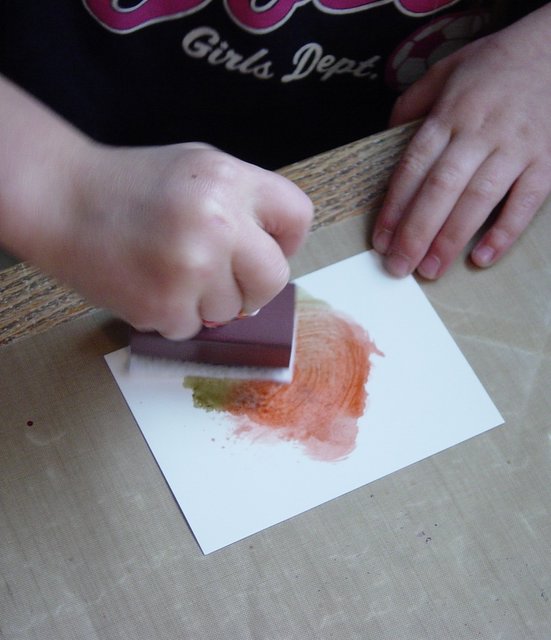 Now we are ready to ink up our glossy cardstock, take the applicator to your cs and give a little twist with your wrist, then move to another spot, you end up doing sort of a dotting/twisting thing until you have covered the entire area.
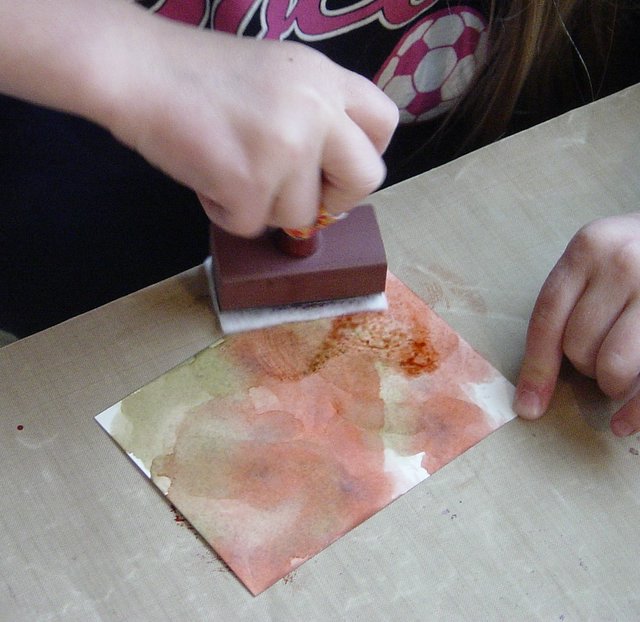
Ink, ink, ink!
So after you have a piece all inked up you can add it to a layout, use it as a mat for a picture, use that die cutting machine to make some funky lettering or shape, use it on a card just get creative!
A couple other techniques that are fun to try.
Ink up the back of a glass side by dripping ink on the back and spreading with a toothpick, then use your heat gun to dry and move the ink around. Glue your inked glass piece onto white cardstock with sparkly stickles for a fun look.
Monoprint (this was taken from Tim's class at CKU Chicago): This must be done with the non-stick craft sheet. dot small amounts of ink onto craft sheet and then place glossy cs (glossy side down) on top of ink puddle and twist until cs is covered. I like using the Metalic inks with this one. It is messy, but gives a very interesting and different look from the finished sample.
You might also find "Blending Solution" on the shelves with Alcohol inks, this is used to soften the colors, you can add it to your applicator or put it in a spray bottle and spritz your completed project for a lighter look. Money saving tip, regular rubbing alcohol will do the same thing as the Blending solution too!
Clean up - use rubbing alcohol to wipe down your craft mat and hands, it will take most of the ink off with ease.
I hope this gives you the push to get out there and try these alcohol inks, I love em! If you have any questions, just leave me a comment.
![]()


2 comments:
i'm so excited...now to find some inks and the rest of the supplies. I'm so glad you mentioned that we can do these on glass cos I bought the Tim Holtz slides. I just knew one day I would do something with them and then I meet you(lucky me) and am going to be doing something I've never done before-well other than when Tim showed me how one time. Thanks and your daughter is beautiful! Gorgeous! She looks like her mom!
That was the first thing I was gonna say too: your daughter is so cute! How sweet that she was helping!
I am so excited about your lesson. Those inks look so cool. My LSS sells them all. I'm going to try this soon! Thanks Nicole!
Post a Comment